Hello,
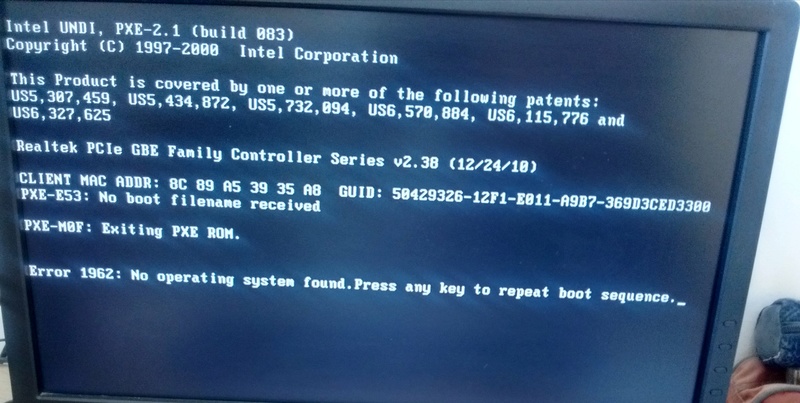
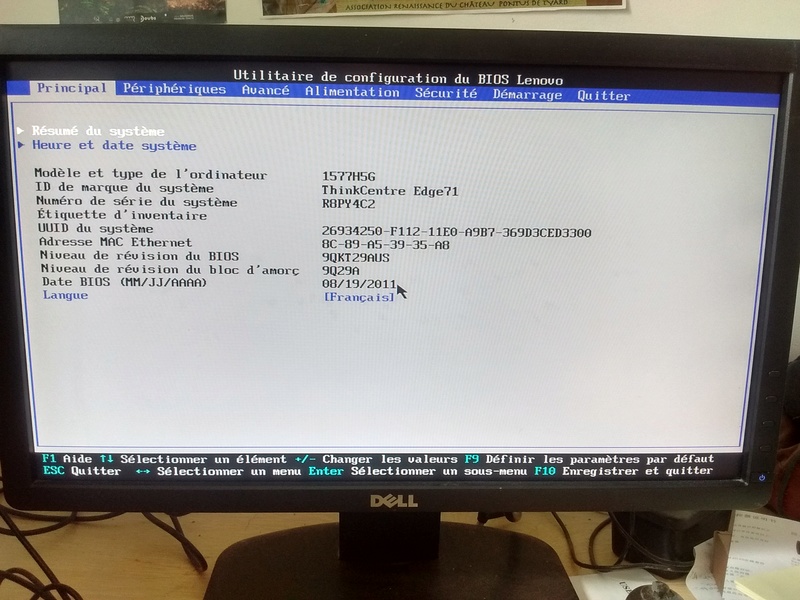
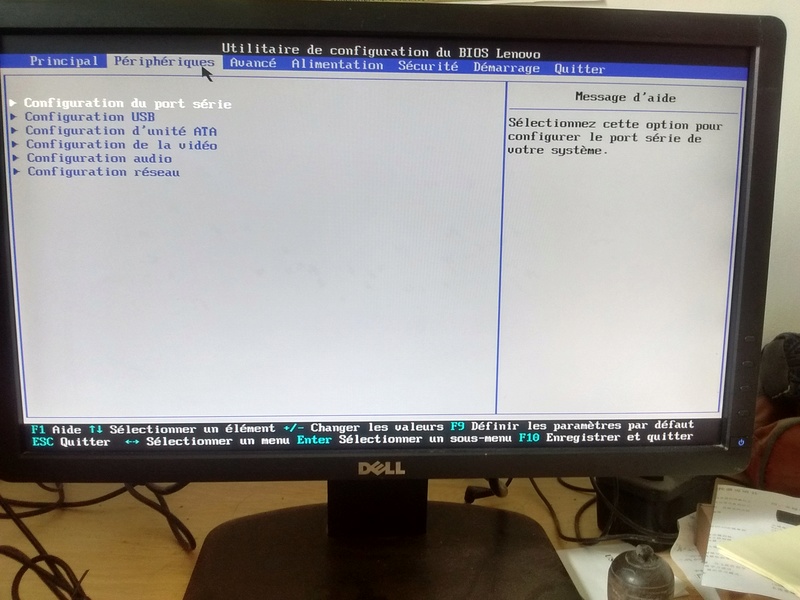
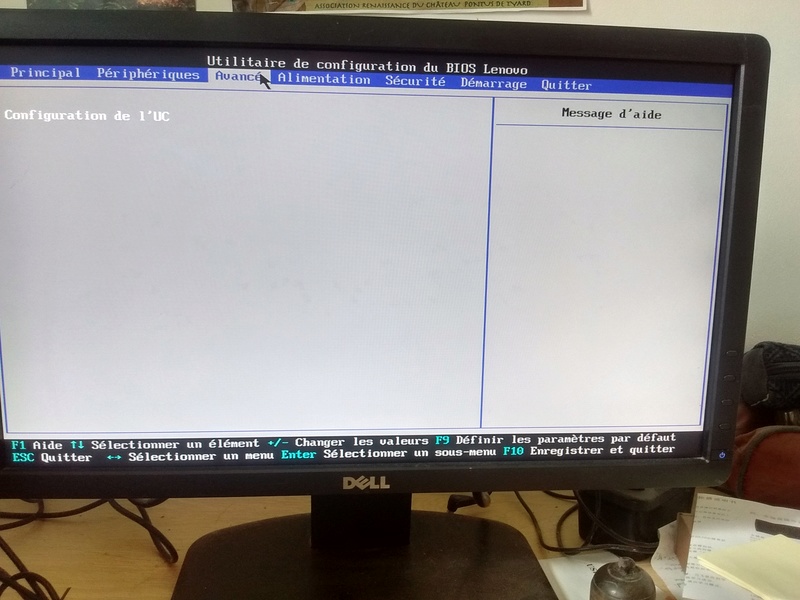
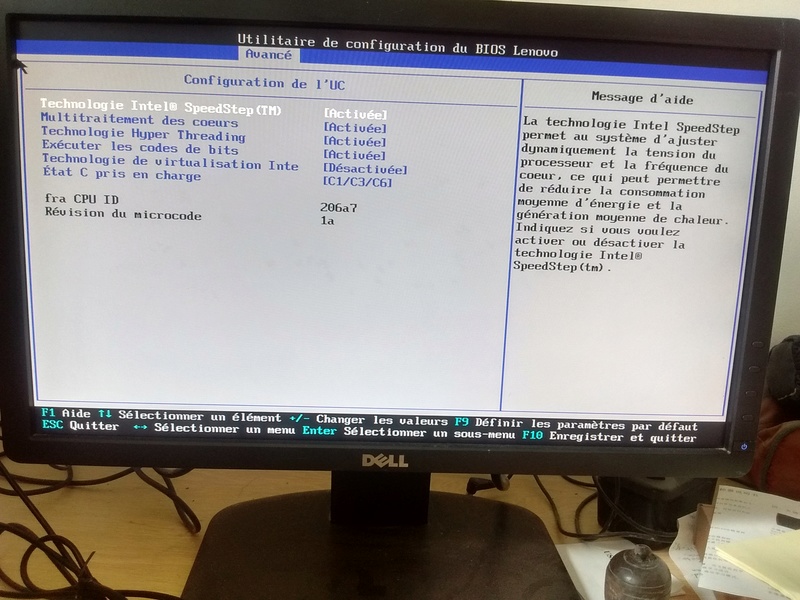
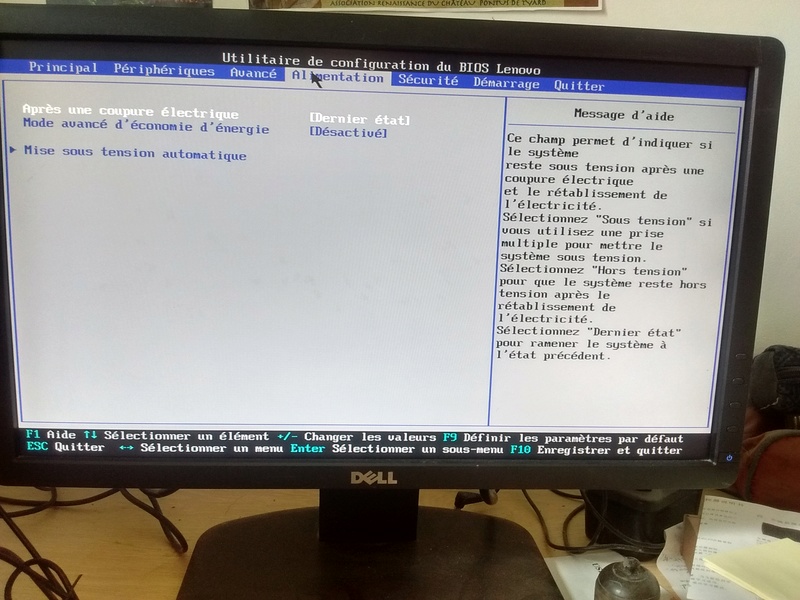
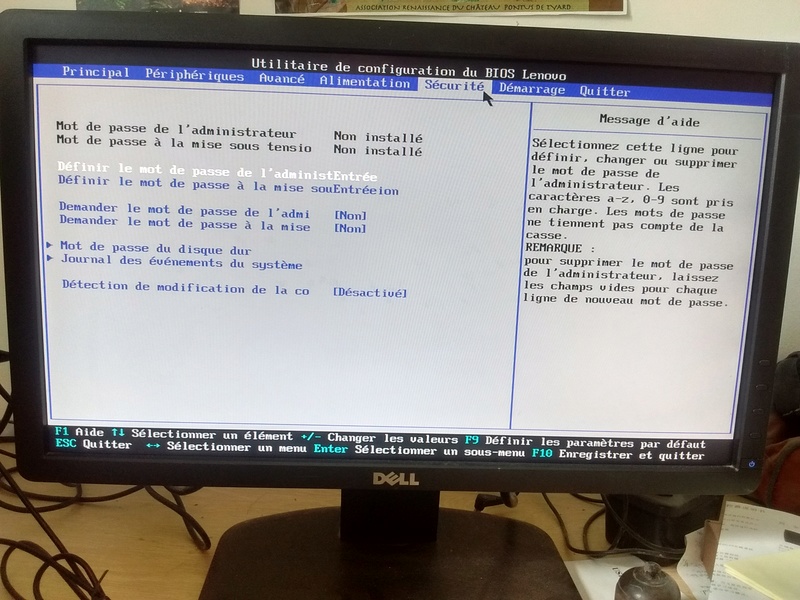
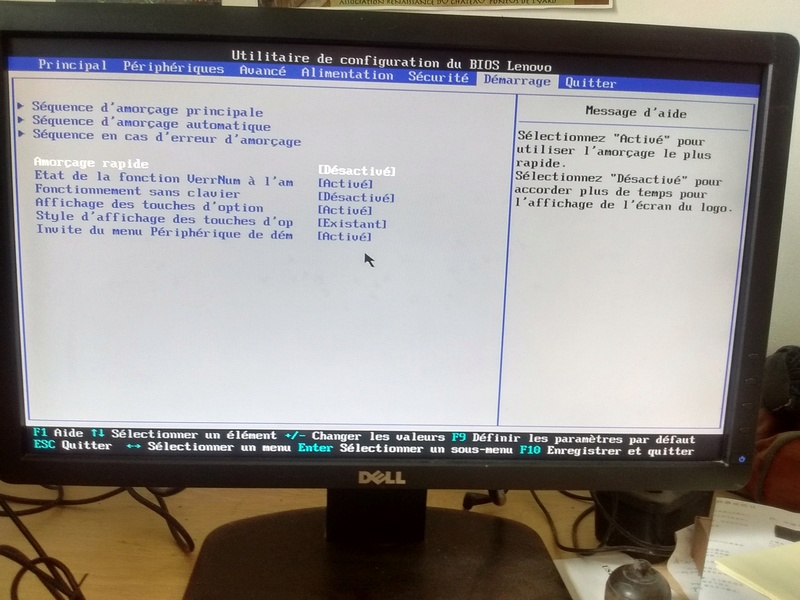
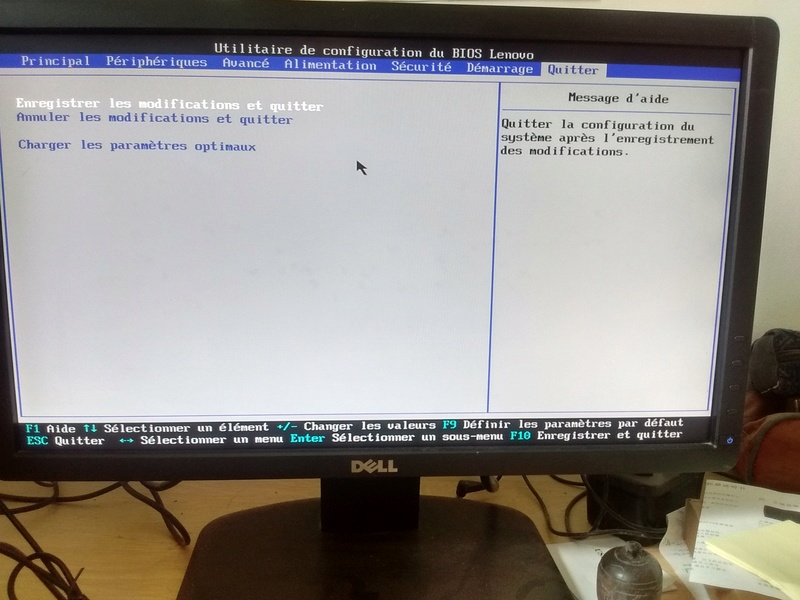
A premiere vue les parametres BIOS semblent bons, il n'y a pas des masses de "fine tuning"...
Si tu te sens:
Tu essaierais avec une mise à jour BIOS de refaire les mêmes manips et voir comment ça réagit?
Je vois que tu n'as pas la derniere MAJ BIOS, la derniere c'est la : 9QKT39A
https://pcsupport.lenovo.com/lu/en/prod … /downloadsVoici le readme / change version du BIOS:
BIOS Changes History
General Information:
9QJ9xxUSA is Flash CD ROM image.
9QJTxxUSA is Flash in DOS zip package.
9QJYxxUSA is Flash in Windows utility.
9QKTxxA is the binary image. (BIOS)
NOTE: All changes carry forward. That is, if a change is added in 01,it is also in 02, 03 etc.
This file will be updated from the beginning with first Production BIOS release
CHANGES for 9QKT14A/9QJT14A
- Initial Production BIOS release
CHANGES for 9QKT15A/9QJT15A
- Fix sometimes prompt use to enter Hard drive password after scanning fingerprint.
- Update Video BIOS to 2111.
CHANGES for 9QKT16A/9QJT16A
- Fix ACPI OEM revision is not right.
- Fix will boot from automatic sequence after power off and then power on.
- Update VBIOS.
CHANGES for 9QKT17A/9QJT17A
- Fix cannot enter password with ";" in SETUP.
- Fix error messages displayed error in system eventlog.
- Fix CPUID and Microcode version displayed wrongly in SETUP.
CHANGES for 9QKT18A/9QJT18A
- Reduce boot time.
- Fix PS2 Keyboard/Mouse cannot be controlled by settings in device manager.
CHANGES for 9QKT19A/9QJT19A
- Fix error messages displayed error in system eventlog.
- Fix will hang XP logo in some certain condition.
CHANGES for 9QKT20A/9QJT20A
-Fixed Parallel Port printer work fail under DOS
-Improved fast boot function to avoid system can not resume from s4 normally
-Add Lenovo's solutin "ECR86420" to solve DMI Error Log test fail
CHANGES for 9QKT21A/9QJT21A
- Fix canot enter BIOS setup using USB keyboard when disable Front or Rear USB Ports.
- Fix there still be COM option in BIOS setup when no COM device exists.
CHANGES for 9QKT22A/9QJT22A
- Update Microcode for CPUID 206A7 to 17h.
CHANGES for 9QKT23A/9QJT23A
- Change some traditional Chinese to simplified Chinese in Setup.
- Fix "Core Multi-Procession" not work in some CPUs.
CHANGES for 9QKT24A/9QJT24A
- Fix system will blue screen sometimes playing blueray disc.
CHANGES for 9QKT25A/9QJT25A
- Add Support new wireless keyboard.
CHANGES for 9QKT26A/9QJT26A
- Update Video BIOS.
CHANGES for 9QKT27A/9QJT27A
- Update CPU Microcode.
CHANGES for 9QKT28A/9QJT28A
- Fix cannot install XP in certain condition.
CHANGES for 9QKT29A/9QJT29A
- Fix some tips in setup utility is wrong.
- Update SRDOS and SRWIN.
CHANGES for 9QKT30A/9QJT30A
- Fix resume error from hibernation in certain condition.
CHANGES for 9QKT31A/9QJT31A
- Fix S4 fail issue
- Update CPU Microcode for 206A7 to 23h
CHANGES for 9QKT32A/9QJT32A
- Fix show COM2 when only one COM port of Taipei.
CHANGES for 9QKT33A/9QJT33A
- Fix show COM1 when only one COM port of Taipei.
CHANGES for 9QKT34A/9QJT34A
- Build from 9QKT31A, updated ME to 7.1.30.1142.
CHANGES for 9QKT35A/9QJT35A
- Fix S3 issue with NVIDIA Quadro card.
CHANGES for 9QKT36A/9QJT36A
- Build from 9QKT34A, updated CPU Microcode.
CHANGES for 9QKT37A/9QJT37A
- Fix stoping at logo screen when no disc in USB ODD.
CHANGES for 9QKT38A/9QJT38A
- Update CPU Microcode for 206A7 to 28h.
CHANGES for 9QKT39A/9QJT39A
- Prevent waiting too long while connecting certain USB devices.
Et voici la procédure (à l'aide d'un fichier ISO):
--CONTENTS--
1 - Installation Instructions
2 - Flash Program Options
3 - Instructions for CDROM
4 - Flashing Back to an Older Level of BIOS
5 - AMIDEDOS - AMIBIOS DMI Editor for DOS
6 - DOS/32 Advanced DOS Extender Software License
*****************************************************************************
* 1. Installation Instructions *
* *
* Please print out these instructions or write them down before *
* starting this flash update utility. *
* *
* BIOS update by DOS utility: There is now one compressed folder *
* released with each BIOS (image name 9QJTxxUSA.ZIP), containing the *
* BIOS image, DOS flash utility, batch files for auto execution, *
* release note and flash instruction. Unpack and copy all files in *
* 9QJTxxUSA.ZIP to a DOS bootable memory key. *
* *
* BIOS update by bootable CD: There is now one CD image file *
* released with each BIOS (image name 9QJ9xxUSA.ISO), containing the *
* BIOS image, DOS flash utility, release note and flash instruction. *
* If you prefer to create a bootable CD to update BIOS, please follow *
* the instructions for CDROM. *
* *
*****************************************************************************
*****************************************************************************
* About Applied Fixes or Features Added *
* *
* CHANGES.TXT is a file that lists known problems which are corrected *
* and/or features added after applying this update to your system. *
* If you like, please take the time to read or print that file before *
* using this flash program to update your system BIOS. *
* *
*****************************************************************************
*****************************************************************************
* Basic Installation Instructions *
* *
* 1. Please make note of any settings you have changed in the BIOS *
* Setup utility. They may have to be re-entered after updating *
* the BIOS. *
* 2. Use the flash update program by putting it in a DOS bootable *
* memory key, or creating a CD with the ISO image. Power up the *
* system and make sure the device with the flash program is *
* selected as a boot device. *
* 3. The current BIOS level on the computer is compared to that of *
* the flash update. If the levels are the same, or the level on *
* the update is older than the ROM, a message is displayed stating *
* "BIOS ROM file is older than (or same as) BIOS ROM image. *
* Continue anyway? (y/n)", type in 'y'. *
* 4. Update may take up to 2 minutes. Do not power off or restart the *
* system during this procedure! *
* 5. After the flash update is complete, system will automatically *
* reboot. Don't forget to remove the flash device or you may be *
* got your BIOS re-updated. *
* *
*****************************************************************************
*****************************************************************************
* 2. Flash Program Options *
* *
* The default operation of the flash update program is a step by step *
* dialogue with the user that presents choices and gathers responses *
* from the user about which choices are desired. *
* *
* In some situations (such as a large enterprise with many systems *
* that need updating), it may be desirable to create a flash update *
* image that requires no manual intervention to perform an update *
* operation. This can be done by modifying the batch file *
* (autoexec.bat) calling the flash program with the following *
* command: *
* *
* flash2.exe [option1] [option2] ... [optionX] *
* *
* [OPTIONS] *
* /h Show help messages. *
* /rsmb Preserve all SMBIOS structures. *
* /clr Clear BIOS settings. *
* /ign Ingore BIOS version check. *
* /sn:nnnnnnn Update system serial number (up to 20 characters). *
* /csn:nnnnnnn Update chassis serial number (up to 20 characters). *
* /mtm:nnnnnnn Update machine type and model number (up to 20 *
* characters). *
* /tag:nnnnnnn Update system asset tag (up to 25 characters). *
* /uuid The flash utility will generate an Universally *
* Unique Identifier (UUID), replacing the one that *
* is currently in the system. *
* /logo:<filename> Change logo. The size of logo file after compression *
* should be less than 8KB (the size of compressed *
* logo file is displayed on the screen during the *
* processing). *
* /cpu Update CPU microcode. *
* /reboot Automatic reboot after all requests done. *
* /pass:nnnnnnn Input current system password. *
* *
* The following example shows how to update system asset tag number *
* to "1234567" use command line: *
* flash2.exe /tag:1234567 *
* *
* The following example shows how to update bios and update system *
* asset tag number by one command: *
* flash2.exe bios.rom /tag:1234567 *
* *
* The following example shows how to change the power-on logo. *
* flash2.exe /logo:myfav.bmp *
* *
* Note: A flash update image using these program options should be *
* tested carefully before widespread usage. *
* *
*****************************************************************************
*****************************************************************************
* 3. Instructions for CDROM *
* *
* Create a CD with the BIOS package 9QJ9xxUSA.ISO. Power up the *
* system and immediately insert the flash CD in the CDROM drive. *
* Ensure that you boot from the CDROM. *
* *
* You can modify the serial number and machine type/model if needed. *
* Follow the instructions for using the flash update program in the *
* basic installation instructions. The utilities mentioned above are *
* located in a subdirectory on the CD. *
* *
*****************************************************************************
*****************************************************************************
* 4. Flashing Back to an Older Level of BIOS *
* *
* In order to flash back to an older level of BIOS, the following *
* steps should be used to insure the latest flash utility is used. *
* *
* 1. Obtain the latest level of BIOS update program from the Lenovo *
* web site. *
* 2. Copy flash2.exe, afudos.exe, amidedos.exe from the latest bios *
* update program folder to the older level bios update program *
* folder. Replace the same files in the older level bios update *
* program folder. *
* 3. Boot with the older level's update program and follow normal *
* procedures. *
* *
*****************************************************************************
*****************************************************************************
* 5. AMIDEDOS - AMIBIOS DMI Editor for DOS *
* *
* AMIDEDOS.exe [option1] [option2] ... [optionX] *
* *
* Options: *
* /SP "String" Update the System Machine Type and Model Number. *
* /SS "String" Update the System Serial Number. *
* /CS "String" Update the Chassis Serial Number. *
* /SU auto Update the System UUID. *
* /SV "String" update the System Brand ID. *
* /CA "String" update the Chassis Asset Tag Number. *
* *
* *
*****************************************************************************
*****************************************************************************
* 6. DOS/32 Advanced DOS Extender Software License *
* *
* Lenovo firmware update utility (FLASH2) uses DOS/32 Advanced DOS *
* Extender technology. *
* *
* DOS/32 Advanced DOS Extender Software License *
* *
* Copyright (C) 1996-2006 by Narech K. All rights reserved. *
* *
* Redistribution and use in source and binary forms, with or without *
* modification, are permitted provided that the following conditions *
* are met: *
* *
* 1. Redistributions of source code must retain the above copyright *
* notice, this list of conditions and the following disclaimer. *
* 2. Redistributions in binary form must reproduce the above *
* copyright notice, this list of conditions and the following *
* disclaimer in the documentation and/or other materials provided *
* with the distribution. *
* 3. The end-user documentation included with the redistribution, if *
* any, must include the following acknowledgment: *
* "This product uses DOS/32 Advanced DOS Extender technology." *
* Alternately, this acknowledgment may appear in the software *
* itself, if and wherever such third-party acknowledgments *
* normally appear. *
* 4. Products derived from this software may not be called "DOS/32A" *
* or "DOS/32 Advanced". *
* *
* THIS SOFTWARE AND DOCUMENTATION IS PROVIDED "AS IS" AND ANY *
* EXPRESSED OR IMPLIED WARRANTIES, INCLUDING, BUT NOT LIMITED TO, THE *
* IMPLIED WARRANTIES OF MERCHANTABILITY AND FITNESS FOR A PARTICULAR *
* PURPOSE ARE DISCLAIMED. IN NO EVENT SHALL THE AUTHORS OR COPYRIGHT *
* HOLDERS BE LIABLE FOR ANY DIRECT, INDIRECT, INCIDENTAL, SPECIAL, *
* EXEMPLARY, OR CONSEQUENTIAL DAMAGES (INCLUDING, BUT NOT LIMITED TO, *
* PROCUREMENT OF SUBSTITUTE GOODS OR SERVICES; LOSS OF USE, DATA, *
* OR PROFITS; OR BUSINESS INTERRUPTION) HOWEVER CAUSED AND ON ANY *
* THEORY OF LIABILITY, WHETHER IN CONTRACT, STRICT LIABILITY, OR TORT *
* (INCLUDING NEGLIGENCE OR OTHERWISE) ARISING IN ANY WAY OUT OF THE *
* USE OF THIS SOFTWARE, EVEN IF ADVISED OF THE POSSIBILITY OF SUCH *
* DAMAGE. *
* *
*****************************************************************************
Mais à faire que si tu es à l'aise.
Car ça reste assez touchy.
Mais vu la machine, ça semble être un simple BIOS, je pense qu'il faut une installation normale en legacy pas EFI.
Si raleur ou/et anonyme, vous voyez quelque chose à ajouter/modifier, n'hesitez pas.
@ bientôt.
JC
Dernière modification par d33p (23-03-2018 11:02:49)
science sans conscience n'est que ruine de l'âme...

![]()